 To start the 2015 on the best foot possible it was time to get my kitchen back in order. It hadn’t gotten too bad, but it was getting to the point where it was annoying to try and find items. I actually do a quick organization like this every two or three months, but this week was the perfect time to really dig in since the last time I organized the cupboards was in October AND it is a new year and this feels like the right move to begin the year. We have a very small kitchen and organization is key to making sure we eat the food we buy and that we can make room for our regular staples.
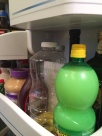
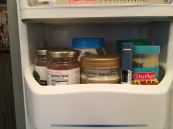
For this project I tackled the refrigerator (I reorganized the freezer last month so it is in proper working order), pantry, baking cupboard, and spice rack. I started thinking I would only do one of the four areas, but once I started I was on a roll and powered through all four (YAY!).
Today I thought I would share some tips for organizing your kitchen in steps that make the whole process less overwhelming, and in my case…fun. This post should help you be efficient and stay practical while you go about your organizing project(s).
Step One: Start with one shelf (or drawer) at a time. Take EVERYTHING (yes, even the items you want to keep) off the shelf. Create three piles– discard, consolidate, and keep. All of the items you take off the shelf need to go in one of these three piles.
 As you take items off the shelf look at their expiration date, if it is expired set it in the discard pile, if it is just a small amount of sauce left that you know you won’t ever eat, discard it. For me, I also look at the ingredients and if there is gluten in the sauce, it goes in the discard pile. If you find you have two bottles of the same item, set them in the consolidate pile. If there is an item you will use again, set it in the keep pile.
TIP: It is important you are honest with yourself during this step. I am one who never likes to throw things out, but then I ask myself, will I actually eat this? If the answer is “eh, probably not,” it goes in the discard pile. Believe me, it is worth it!
Step Two: After you have cleared the shelf and separated the items it is time to wash the shelf. After a couple of months of use shelves tend to get those pesky dried on sauces or spills that are tough to clean off. This is the perfect time to really clean them since the shelf is completely empty. Remove the shelf and wash it with hot soapy water for the ultimate clean.
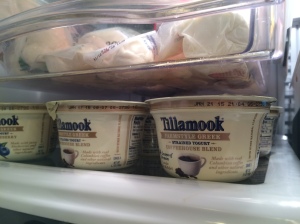
 Step Three: Once your shelf is totally clean and dry, put it back in the fridge. Before you place it in the exact same position consider changing the location. Ask yourself – was it functioning at its full capacity in the old spot? What items do you intend to put on the shelf? Do they need more space; maybe less space? For me, I needed a shelf that could hold small yogurt containers because I tend to buy my yogurt in bulk. I created a shelf that was just the right height for the yogurt containers and now they don’t need to be shuffled around when larger items come into the fridge.
Step Four: Place all your keep items back on your shelf. Combine the items in the consolidate pile and put the consolidated version of your item back on your shelf.
Step Five: Time to move onto the next shelf. Repeat steps one through five with all the shelves in your kitchen, pantry, cupboards, or spice rack. You will be amazed at the space you create and the organization you can have in your kitchen.
Step Six: Once you have cleared all the shelves and completed your cupboard or refrigerator discard the items in the discard pile, empty the containers, compost the compostable, and recycle the recyclables. Voila! You did it! Yay for clean and organized kitchens!
A few other tips to help you be successful –
- Back stock – I have a back stock shelf in my basement. It is simply a bookshelf where I put all the extra items like chicken stock, toilet paper, and double items (like spices that I accidentally purchased twice). This shelf works great for all the items I don’t want to keep in the kitchen, but want to have on-hand when I am cooking. I always look here first before I head to the grocery store.
- Keep “like” items together – Keep similar items together. In my fridge I have it divided into areas of use – all the salad dressing, cooking supplies, hot sauce, oil, butter/margarine, sandwich supplies, etc. are together so I know where to look when I am need an ingredient.
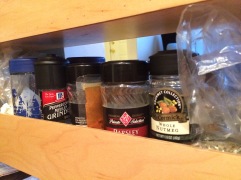
- Alphabetize your spices – There is nothing better than an alphabetized spice drawer. I know it sounds a little OCD, but let me tell you, it is worth it. I can always find the exact spice I need without having to search and search the spice rack. The key to making this work for the long-term is to put the spices back in their alphabetical order after you use them. Over the course of one year I find the spice rack gets out-of-order so this is a great task every January.
- The pantry, shelf by shelf– Keep like items together in your pantry like pasta and grains, canned goods, snacks, and chips. I label the shelves so anyone who accesses the pantry knows where to look or where to put things away. Since we have a small pantry we installed pull out drawers to allow the entire shelf to be used. When I keep all the like items together I can just pull out the shelf I want to find the ingredient I need.
 Stack the baking cupboard – Use stackable boxes for baking ingredients. Keep the items you use daily (like salt and pepper) on the most accessible shelf and the items you use less (like chocolate chips for baking) on higher where you might need a stool.
What part of your kitchen do you need to organize? Send in pictures of your success!
Happy organizing! XO, Olivia


[…] Want to declutter your kitchen? Here’s a great post from Hammersparklechalk to get you organized! […]
LikeLike